How To Carry A Kayak By Yourself? (5 Steps)
Carrying a sit-in kayak elegantly deserves a lifetime achievement award.
And learning to carry one safely, without damage to your body, boat, or buddy is possible with little practice.
The most important thing is to always be sure to lift a kayak with your knees bent, don’t lift with your back, and then flip the boat onto your shoulder and turn in the desired direction. If you’re hoisting the kayak onto the top of a vehicle, there are various pieces of equipment to help you, such as a kayak cart and lift-assist tools.
In this article, I will share a technique for carrying a sit-in kayak, as well as a sit-on-top kayak, on your shoulder.
No special equipment is required for this lift, although if you do opt to get a padded shoulder strap, it will help absorb some of the boat’s weight.
I carry my sit-on-top kayak on my shoulder everywhere I go – from the boathouse to the water, from the water to the car, and when I need to transport my boat around a tricky section of a river.
5 Steps For Lifting A Kayak On Your Own
First, practice lifting a kayak onto your shoulder – start with the bow facing forward, because it will be easier to lift this way. Smaller kayaks are much easier to lift than larger ones, and can be mastered within a few practice sessions.
Step 1:
Place the kayak on the ground, with the boat’s bow pointing in the direction you’re moving.
Position the boat with the cockpit facing you – you’ll be lifting the kayak from the part of the cockpit closest to you.
Keep in mind, this is trickier with sit-on-top kayaks, because they don’t have a cockpit rim that can be rested on your shoulder.
Step 2:
While standing in a slightly forward-lunge position, bend your knees and squat down slightly – then grab the close edge of the cockpit.
Step 3:
Stand up, sliding the kayak upwards using your thigh as support.
Remember to always lift with your legs, not your back.
The kayak will now be sitting on your thigh.
TIP1: Lean back a little during the lift – I find it improves balance.
Step 4:
Reach over to the opposite side of the cockpit, and pull it up onto your shoulder.
If the bow is on your left, you’ll lift the kayak onto your right shoulder (and if it’s on your right, you’ll lift it onto your left shoulder).
Simultaneously, turn your body in the direction you are headed – the bow will now be facing away from your body.
TIP 2: Brace the inside of the cockpit area with your elbow to steady the sway of the kayak.
Step 5:
The rim, also called the “coaming”, should rest on your shoulder – now you’re ready to walk forward.
TIP 3: Wear your personal flotation device (PFD) while carrying a kayak – the shoulder strap of the lifejacket makes the boat more comfortable to carry.
Expect The Unexpected When Learning To Carry A Kayak

A kayak’s weight does not behave like the weights you lift in the gym.
Instead, kayaks can be somewhat unpredictable when they’re being carried, depending on factors like wind or the terrain where you’re walking.
Technique often trumps strength when it comes to lifting a kayak.
1. Expect Uneven Weight Distribution Between The Bow And Stern
Keep in mind that the total weight of the kayak will often be unevenly distributed around the seat area.
In real terms, this simply means the heavier side will tilt towards the ground unexpectedly.
Sometimes the rudder (if your boat has one), will make contact with the dirt.
Bracing your elbow in the cockpit area towards the bow of the vessel can help you steady this tilt.
2. Kayaks Are Unwieldy To Carry
Just because kayaks can glide gracefully on water, on land they can just as easily morph into what feels like a cumbersome walrus.
At first, piloting even a slight change of direction or obstacle may feel like a major feat.
With the bow and stern reaching six to eight feet both in front and behind, ordinary activities at the outset seem like intimidating hurdles.
Due to the reach you have with a kayak on your shoulder, it’s imperative to be aware of every aspect in your environment.
Knocking the kayak into anything can cause damage to your boat, not to mention the object you hit or person you bump into.
Inflatable kayaks are generally lighter than hard-shelled kayaks, but even then, it can still take two people to carry them.
If you’re carrying your boat alone, you can use a carry strap to help you hoist your boat.
A carry strap has two straps that go around the middle of your kayak, and usually has a padded shoulder strap.
3. Don’t Place The Kayak Down Too Hard
Be attentive when it comes to how and where you set your kayak down on the ground.
A carbon fiber or composite boat is not built to withstand impact.
Once you lift the boat off your shoulder, the speed at which gravity wants to plonk the boat back onto the ground can be somewhat surprising.
Brace yourself, not just for surprise, but to avoid a potential strain on your body.
Before setting your kayak down, check the area around you for any sharp objects that could accidentally puncture the hull, and always set the boat down as gently as possible.
This comes more quickly with some practice.
4. Bail Water Out Of The Boat
The likelihood of having water inside your kayak after your trip is high.
Remove as much water as possible before lifting your kayak, otherwise water inside the boat will disturb the kayak’s balance point and make it harder to balance.
Lift the stern and bow alternatively by holding a grab handle.
Kayak Cart And Roof-Rack Loading
Kayak Carts
If you know you’ll need to lift and carry your kayak over longer distances, it’s a good idea to invest in a kayak cart.
Kayak carts are two-wheeled attachments that work on the same basic principles of a wheelbarrow.
They fit over one end of the vessel, and allow you to wheel your boat to and from the water.
The cart will carry the majority of the load, you just have to ensure that you secure the kayak to the cart well using stern tie-downs so it doesn’t wobble off.
Some carts even have suction cups or straps for this reason.
Roof Racks
There are different types of vehicle roof racks.
A J-rack (or J-cradle) is shaped like the letter J, and holds the kayak in place in the proper position (on its side).
The J-rack is a convenient accessory because it can fit onto your existing roof rack, and can be used to carry more than one kayak.
The only drawback to a J-rack is that you have to be able to lift the kayak over your head to put it on the rack, which can be difficult for one person to do (even with shorter boats, but especially with a heavy kayak).
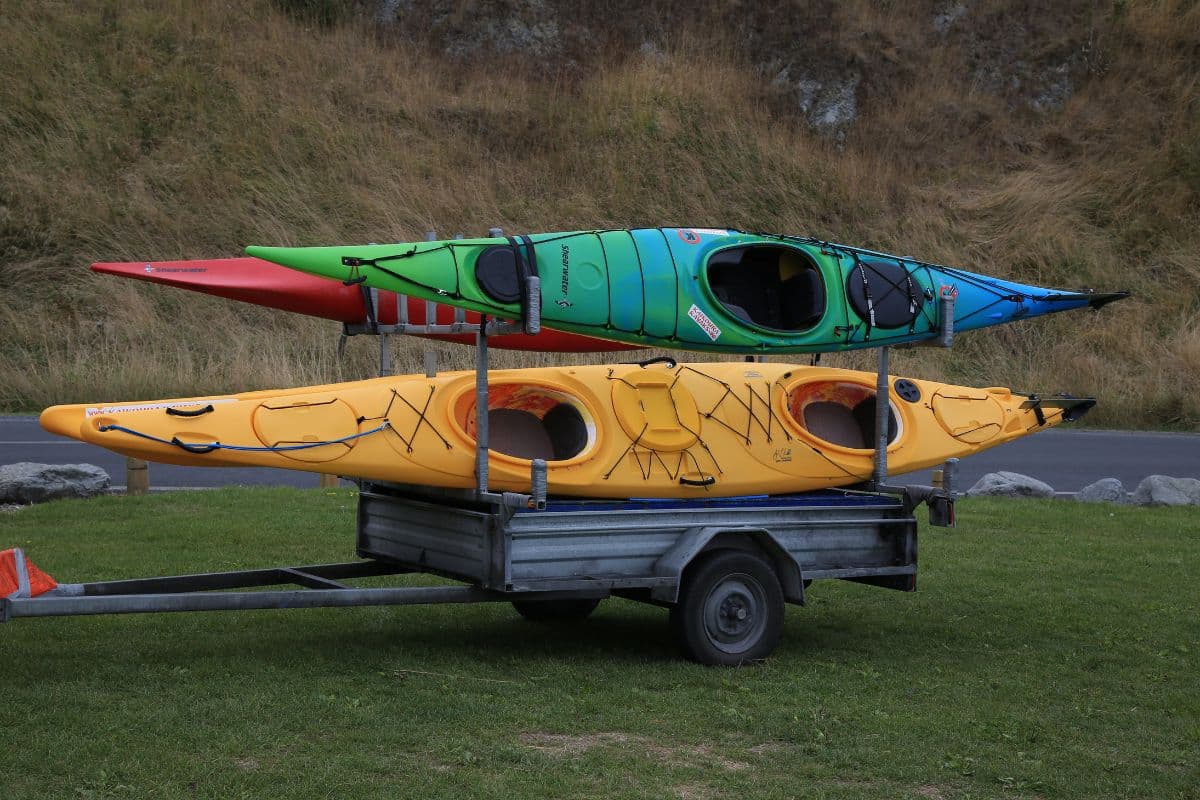
If you have to load two kayaks or more, it’s a good idea to opt for kayak stackers, which allow you to stack the kayaks alongside each other on a rack.
Stackers are often used for touring kayaks, recreational kayaks, and whitewater kayaks.
If you usually go out paddling on your own, it makes sense not to opt for heavier kayaks.
Lift-Assist Options
If it’s too late to get a lighter kayak, you may benefit from investing in a roof rack system that actually lifts the boat onto the roof for you.
You can use something called a suction roller to help you get your kayak onto your roof rack more easily.
Some top-of-the-line racks have lift-assist.
A lift-assist tool makes use of an arm rack that extends out to hoist your kayak up.
Then, once the kayak is on top of the vehicle, you can use cam straps to secure it.
What Gear Do I Need To Transport A Kayak Comfortably By Myself?
No special gear is required for carrying kayaks.
That said, there is equipment available to make the job easier, for instance:
- One-shoulder kayak carry straps
- Carry straps that act as a yoke (most but not all kayaks come with fitted handles, and a carry strap is very useful)
- Kayak carts
- Roof racks
- Cam strap
Can A Kayak Be Pulled By The Grab Handles?
Dragging a kayak by its carry handle for any distance more than a few meters over smooth terrain is not recommended, particularly if it’s made of fiberglass or composite materials.
These boats have more fragile hulls that can be scratched, cracked, or punctured by various objects on the ground.
It’s also not a good idea to drag an inflatable kayak along the ground.
However, a plastic kayak can usually be dragged, as long as you’re dragging it on sand or grass, and it has a skid plate to protect it.
Can Anyone Carry A Kayak?

Sit-in kayaks come in different lengths, weight ranges, and materials.
Assess the weight of the kayak before attempting to carry it solo.
Learning the correct technique to lift and carry your boat over any distance is certainly just as important as gauging if the weight can be lifted safely.
For children, an inflatable kayak, or “inflatable yak”, is the better option.
Smaller adults and children should use a lighter kayak and attach a kayak carry strap to help them lift and carry their boats.
And if you have back issues, it’s a good idea to invest in a lift-assist product.
Conclusion
Kayaking has become such a popular sport over the years, but transporting kayaks still remains challenging, whether you’re a serious kayaker or you do it for purely recreational purposes.
Before going on a kayak trip, be sure to assess your own physical limitations and determine whether you are strong enough to lift and carry your kayak on your own.
You also need to learn the proper technique for carrying a kayak.
Always be sure to lift with your knees bent, and then flip it onto your shoulder and turn in the desired direction.
If you make use of these tips above, and maybe invest in a few tools to assist you along the way, you shouldn’t have any problem carrying your kayak by yourself.
Table of Contents


